


 A crafty update. It has to be fast because I am out the door, headed on a field trip with the 4th graders from my school. Today I have for you a couple of cute boxes I made using PTI's Baby Button Bits. The sentiments are from Everyday button bits. I used doodlebug brads and patterned paper. The cardstock is from PTI, as well as the ink and ribbon. Thanks for coming by!

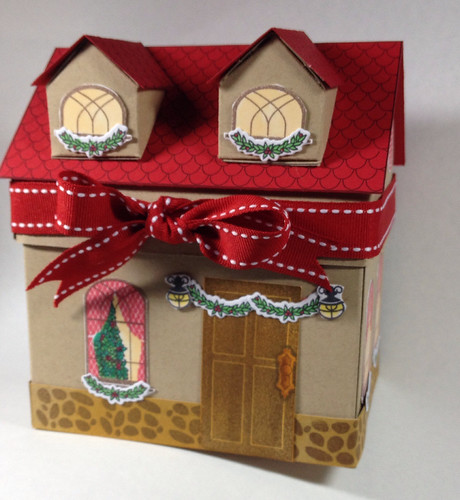
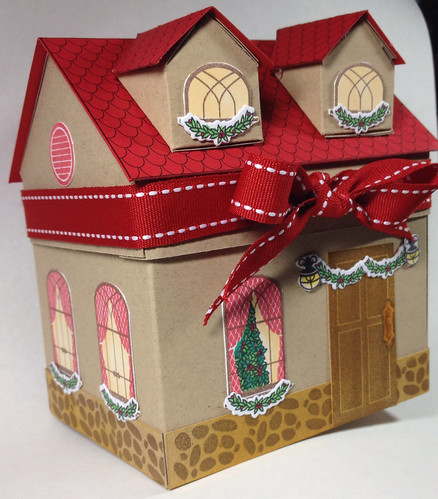
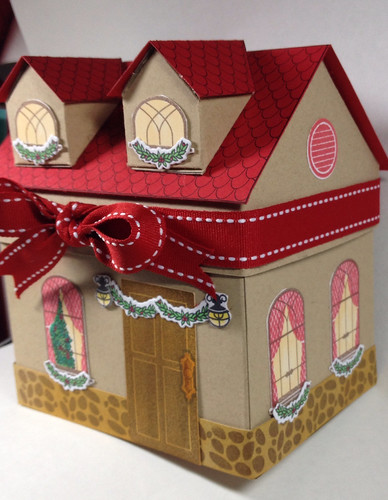
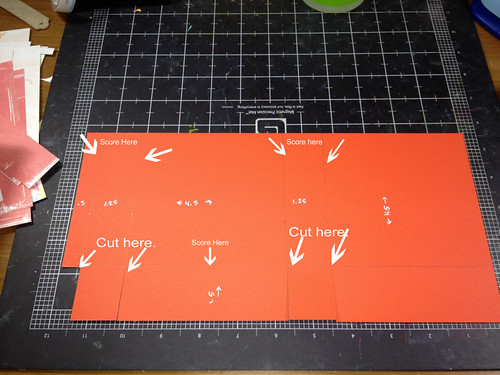
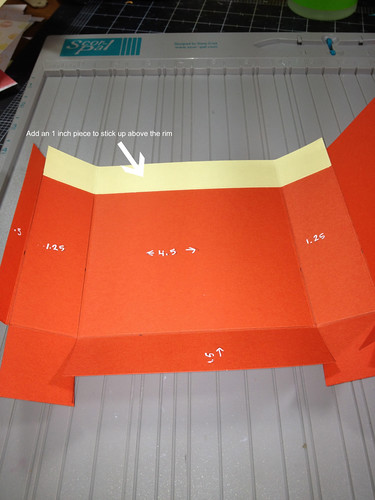
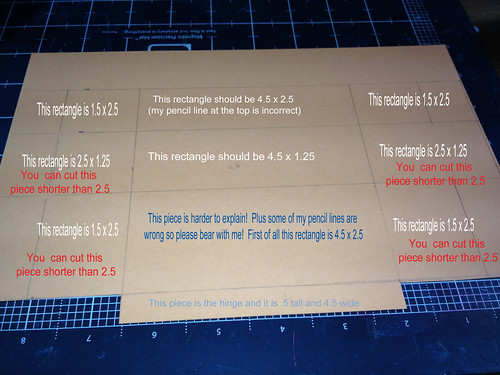
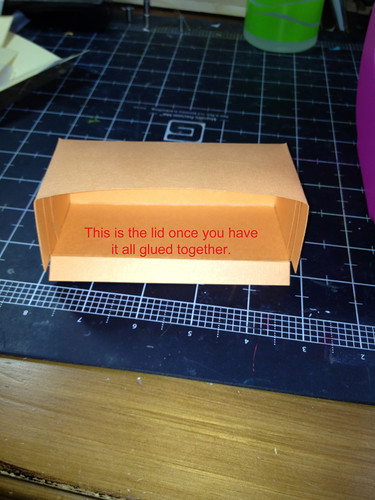
 No stamping here! Can you believe it? I saw this cute little box on someone else's blog and for the life of me cant find it again. I will look some more today after work and try to hook you up with the original. Its really cute, made out of one sheet of cardstock. I used some old three bugs in a rug patterned papers and die cuts. The cardstock is PTI scarlet jewel. The brad is from Making Memories and the bow is from American Crafts. I used a BG magnet to keep it closed.
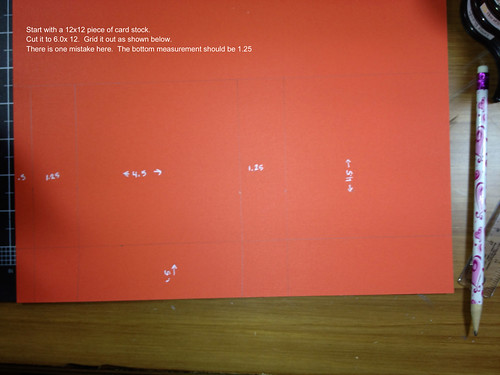
 Are these not the cutest little boxes? Totally not my own personal idea. I got the idea from this blog. Awesome tutorial here by Teresa. Go there if you want to learn how to make them. Really easy to follow tutorial posted there. I have Hershey's kisses in mine. Each box holds 4 kisses. The ones above are made with Cosmo Cricket paper that I got from the wonderful Beverly.
 This set was made with last year's Valentine papers by Pebbles Inc. Its tied up with some American Crafts ribbon (that I bought a LONG time ago). The stamps are Hero Arts and PTI.
 Finally we have some Raspberry Fizz goodness. The paper is all by PTI. Ribbon from Mikes. Stamps from PTI. A little random bling and some magenta stickles. Lots of fun making these. Not sure what I am going to do with them. Maybe give them out to the teachers at school if I end up making enough.