Monday, June 27, 2011
Butterflys
Hello friends! By the time you see this I will be in Moss Landing. I can't wait! This is probably the last of the scheduled posts... I am not sure but I think its the last I am going to get done. I will be home and crafting again July 1.
Everything here is PTI, except for the butterfly. The butterfly is from Hero Arts. I love that set. Its called Antique Engravings. Its a relatively new set. The sentiments are from Vintage Picnic. The paper is all PTI. Thanks for continuing to visit while I am on the road! See you soon!
Labels:
crafty stuff,
hero arts,
PTI,
sets,
vintage picnic
Friday, June 24, 2011
Snail Mail
Hello there! I am still in Colorado (well technically I haven't even left yet... but when you see this I will be there!) I have a lovely vintage picnic basket for you today. Just a single card, no set! LOL! If I could do this over I would switch out the pp. Doesn't quite work but its too late that puppy is glued down. Ah well. The pp is from American Crafts- newer line. Everything else is PTI. Thanks for stopping in!
Wednesday, June 22, 2011
Sea Shore Card Gift Set
Hello there friends! I am off in Colorado but I left you some eye candy! I made these cards just because. I don't even have a planned recipient yet and I haven't gotten around to making a box or envies either.
The seashells come from the same Hero Arts set that has those pretty butterflies. Its called Antique Engravings (I think...). The sentiments are from PTI Vintage Picnic. I stamped in dark chocolate and then colored with my copics.
The base card is PTI ocean tides. The pp is from My Minds Eye. Its a bit older. The paper with the stamping rustic cream.
A close up for you. Easy peasy coloring, trust me on this. Have a great day!
Monday, June 20, 2011
Can You Stand Another Card Set?
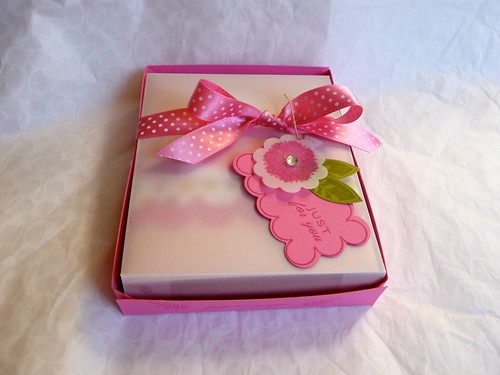
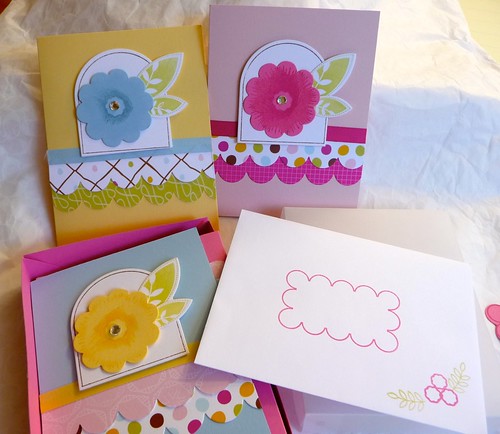
Good Morning Friends! Its the first day of my summer break and I am thrilled! I did get up and take my kids to school as they have two more days (different district). This is the last of the teacher gifts. This one is for my daughter's Language Arts teacher. Same basic construction as all the boxes from the last week.
For this box set I used all PTI stamps. The sets were: Fillable Frames and Sending You. I used some PTI dies as well. The patterned paper is from American Crafts and PTI. Vellum and Cardstock by PTI. The inks are from a variety of sources including, Dew Drops, PTI, and Colorbox.
None of the cards have sentiments. I couldn't decide where to put it so I ended up leaving them blank. This was a rush job done during my last teaching week of school so I was working very quickly.
I did take the time to decorate the envies. I really like decorated envies. I think it just makes the card that much better. Do I always do it? No, but I should! LOL.
So tomorrow I am off to Colorado. My kids and hubby are staying home as this is a work trip for me. If you know many teachers, then you know its not often they get a work trip- especially to another state! This is some side work with curriculum that I am doing with a textbook company. I have never done anything like it and I am really looking forward to it. As soon as I get back I will turn around and drive down to Moss Landing- which is right near Monterey, California and very close to my hometown. I will be teaching science at the Moss Landing Marine Lab to other elementary school science teachers. We will be learning both lesson structure ideas and actual science content. I have been involved in this program for the past 3 years and I am really looking forward to this as well. I am going to miss my kiddos but I am very excited. Anyhow that is my long winded way of telling you that the blog will be dark. I am trying to put together a few posts for while I am gone but it may not happen. I will be back for good on July 1... and hopefully soon after will have some crafty goodness for you again. Thanks again for stopping by!
Labels:
crafty stuff,
fillable frame,
gifts,
PTI,
random crap,
sending you,
teachers
Friday, June 17, 2011
Another Butterfly Card
Same basic card as the ones in the boxed set from a few days ago. The big difference is the kraft background. The flowers are stamped with TH distress inks and PTI chai ink. The butterfly is colored with copic markers. The butterfly is from Hero Arts (Antique Engravings) and the flowers are from PTI's Life.
Wednesday, June 15, 2011
Teacher Gift- Apple Cards
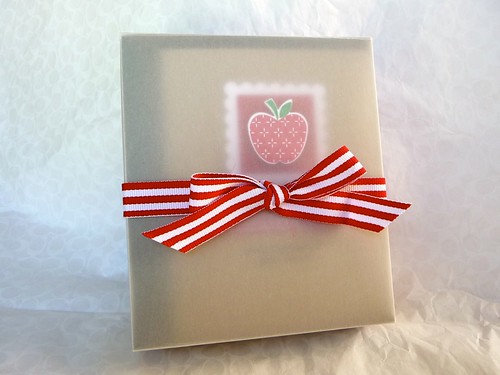
Hello Friends! I am back with another teacher gift. This one was for my friend, Lisanne. She is a new teacher at our school. She just graduated her first class of little Kindergarten kids. I thought next year she might need some cutesy cards.
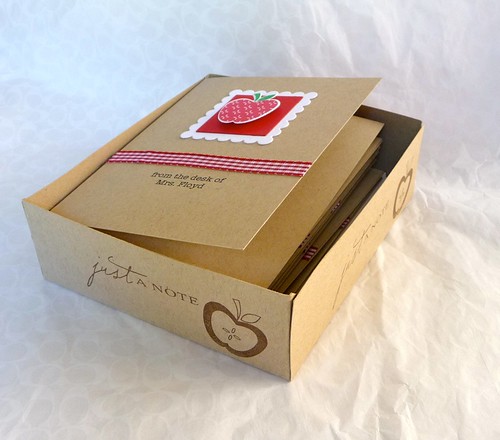
Same basic idea as the previous two days. Box of cards with a vellum lid. This time the lid goes over the outside of the box (because measuring is not my strongest skill), other than that its just like the others. The sides are a little deeper because this is an 8 card set.
The "from the desk of...." is printed on using the computer. I used microsoft word to do this. I learned how from a great tutorial on Jennifer McGuire's blog. All other stamps are from Papertrey ink. I was using the anniversary set and Fruit Fusion Apples.
The red box and the scalloped white box are nestabilities. The red gingham ribbon is from Making Memories (Big Lots score from last summer). The polkadot frame on the envie is from fillable frames.
I hope you like them. Thanks, as always, for stopping by my blog!
Labels:
anniversary set,
crafty stuff,
fruit fusion,
gifts,
PTI,
sets,
teachers
Tuesday, June 14, 2011
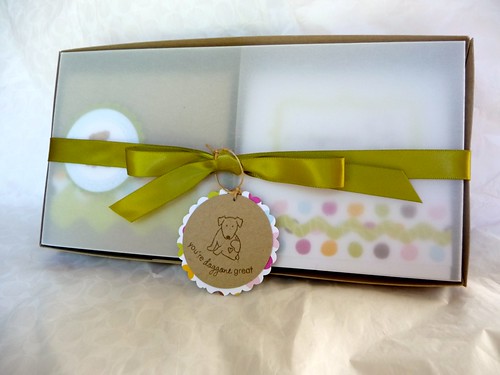
Teacher Gifts- Doggie Notecard set
Good Morning Friends! I have another notecard set for you today. This one is for my son's teacher. She loves dogs. This happens to be the only dog stamp I own. Its from Tiny Treats Valentine by PTI.
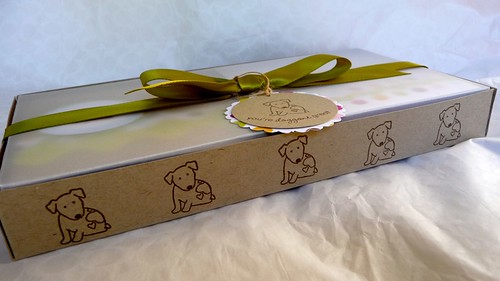
It's the same basic construction as yesterday's box. Except that the cards are 3.75x3.75 and I laid them next to each other to get the measurement for the bottom of the box. All other measurements (adding the 1.4 inch and the inch all around) are all the same. I stamped the little dog onto the sides. Isn't he cute? Vellum top made very similarly to yesterday's project.
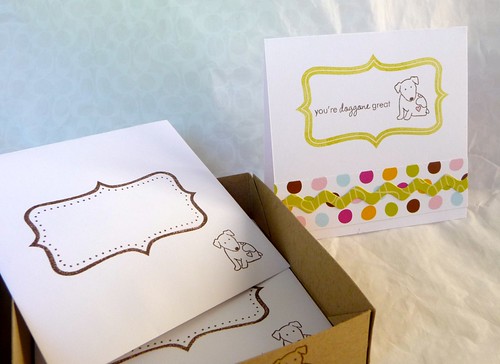
Inside you can see the two different notecards. The patterned paper is from American Crafts. Sunshine or something like that. I cut it out using the large and small ric rac dies. On the front we have stamps from Tiny Treats, Tag Its, and Fillable Frames. A variety of inks from a variety of sources were used as well.
The 4 inch square envies are also from PTI. I decorated them to match the little notecards.
I have kraft envies for the kraft cards and white for the white ones. I love those cute little envelopes, they really make the gift. You might also be noticing a divider. Just a little piece of scrap card to keep the cards from shifting everywhere. If you put in a divider you will need to cut a little slit in the lid to go over it. Simple and easy to do.
Thanks so much for stopping by my blog. I appreciate you taking the time to come by! Have a good week!
Labels:
crafty stuff,
fillable frame,
gifts,
tag it,
teachers,
tiny treats
Sunday, June 12, 2011
Teacher Gifts- Butterfly Card Set
Hi Friends! I have something pretty for you today! Its one of those things I don't want to give away! That happens on occasion! This is a gift set for my daughter's teacher. Lets start at the beginning shall we? This box is made from two pieces of paper; a piece of kraft cardstock and a piece of vellum. I am using PTI vellum which is much thicker than any other vellum I have worked with. I don't think it would work so well with a flimsy vellum. It would work fine with clear acetate. Making the box is pretty simple. Simply take the size of your card (mine was 4.25 x 5.5) and add a quarter of an inch. So that would be 4.5 x 5.75. Then add an inch to all sides. So now we are at 6.5 x 7.75, with me so far? Cut your cardstock to be 6.5 x 7.75. Score at 1 inch on all sides. Cut into two of the short lines on the two long sides so that you can fold up your little box. Clip the corners at a diagonal so they don't peak out. Now before you glue it together stamp your little sides. Keep in mind that the fold is the bottom, that way when you put it together it will all be right side up. (yes, I have ruined many a box with upside down stamping). Ok now for the vellum piece. This is a little trickier. First of all it needs to be just a hair smaller because the lid tucks in the box not over it. So remove about an 1/8th of inch from the original measurements form the bottom. Fraction time! LOL I just cut mine to the original (6.5x7.75) then I scooch it over and take off an eighth of an inch from the width and the length. Now go score that puppy at one inch on all sides. Cut into it the same way and give a test fit. Does it fit perfectly? If so slap on some score tape. If it poofs upwards to much go back and trim a little off the sides, then slap on the score tape. Ok box is done!
Moving on to cards and envies. If ever there was a time for a decorated envie, its now! Lets do that first cause its easier. Select your envie. Stamp a coordinating stamp on the flap. Then turn it over and use an adorable fillable frame for the addressee portion and a cute little matching stamp in the corner. Repeat for all envies.
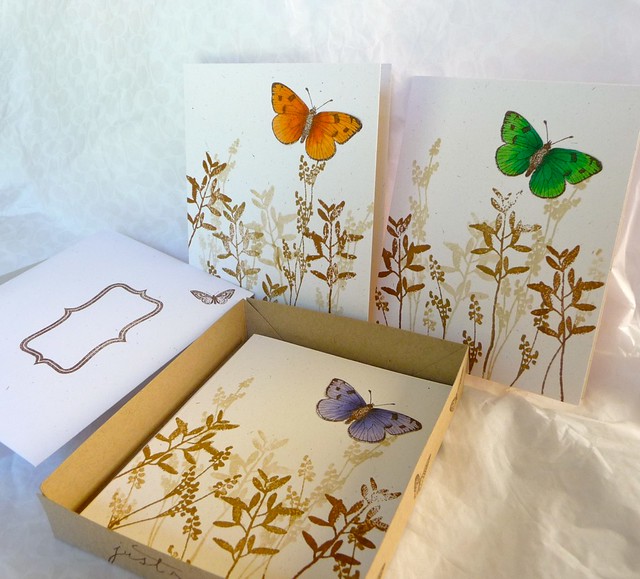
Last but not least, we have the cards. Cut your paper and score it. I am using rustic white by PTI. Stamp the background with a variety of brown inks. I am using Life stamp set by PTI and distress inks in vintage photo and brushed corduroy. I am also using PTI chai ink. When the backgrounds are done go dig up some scraps of cream colored or white cardstock. Stamp the butterfly as many times as you have cards (and maybe one more in case you screw up). Color the butterflies with your copic markers (or color medium of choice). I used stamps by Hero Arts. Dark chocolate ink and copic markers. Go stamp the butterfly on each of your cards. Cut out the butterflies that you colored. Go ahead and cut off the antennae, you will use the ones on the cards. Adhere your colored butterflies over the stamped ones. That's it! Cards are done. Put the cards in the box, top with the lid. Tie on a pretty coordinating bow ( I used PTI terracotta tile satin). Make yourself a cute tag using a butterfly (color it pretty) and a fillable frame. Glue em together, punch a hole and tie on some twine. If you measure carefully (ha I did not!), and don't drop anything in an ink pad (who, me?) you should finish this in about an hour or so. Have fun!
Thursday, June 09, 2011
Picket Fence Thank You
Tuesday, June 07, 2011
Year of the Flowers Minis Set
Good Morning! Happy Tuesday! Its my last week of teaching class! We have only two weeks left and I close the lab after this week. Yay! Today I have a thank you card set that I made with the Year of the Flowers Mini set from PTI. These were meant to be a set but my husband took 2 so now I have to make two more.
First up the morning glory. Love this flower! I colored all the flowers with Prisma colored pencils because I wanted single layer cards on white with no bleed through. You could use copics but unless you have some super thick paper you would need to line the inside.
Here we have lily of the valley.
Next up is gladiolas. My favorite flower in real life but not in this set.
And last but not least the daffodil which is my favorite flower of the set. The thank you sentiment is from this year's anniversary set which is not for sale. However if you really wanted it plenty of people are hawking their extras. Thanks for stopping in!
Labels:
anniversary set,
crafty stuff,
PTI,
thank you,
year of the flowers
Monday, June 06, 2011
More Cherry Fun
Four days in a row! I am on a roll.... for now anyway. My son is better, my daughter is now extremely sick. Ah the day in the life of a mom. But anyway you aren't here for that, now are you? I have one more cherry card for you today. I used all PTI product on this one. I really love those little cherries. I bought the apples too but for some reason they aren't even inked up yet. Thanks for stopping in!
Sunday, June 05, 2011
Just a Note
Good Morning! Happy Sunday to you. My son is now well but my daughter is now sick. I have a feeling its going to be another long week. Anyhow... today's card features the picket fence die from PTI. I also used stamps from the PTI anniversary set. The little Astrix like stars are from technique tuesday. Just a simple little card I made during some of my down time last week. Thanks for stopping in!
Saturday, June 04, 2011
More Cherries
Good Morning! I have more cherries for you today! Once I started with the cherries I had a hard time stopping. LOL! For the first card I used some versamark on kraft paper for the base. I added some cosmo cricket and pti paper scallops. Next I got out one of my fillable frames (which #? I dont know! sorry!) and die cut it and stamped the frame. Then I added the cherries, colored with copics and added a layer of "liquid glass".
Here's a close up. The ribbon is melon, which matches the paper. Its tied around some red cardstock. No room for a sentiment but if I remember correctly I stamped the inside of the card with a thank you sentiment and another cherry.
Finally a little cherry tag. I cut the tag out of pure poppy cardstock with my tag die. I added some white adhesive felt flowers (I think they are by Queen&Co.). Then I followed up with another fillable frame, more cherries, some ripe avocado ribbon, and a button. I think its done! LOL! Have a great weekend.
Labels:
cherries,
crafty stuff,
fruit fushion,
PTI,
tags,
thank you
Friday, June 03, 2011
Thank You Cherries
Hello there! Its been an exhausting week here. My little boy has been so sick. We spent all Tuesday in the E/R but I guess its just a bad stomach bug. He has missed the whole week of school, poor little guy. Anyway I have many cards but none had been photographed or uploaded or edited- hence the blog silence.
However today is a new day and I have for you a thank you card featuring PTI's fruit fusion. I am a sucker for cherries. These are yellow like my favorite Rainer cherries. Oh they are so tasty. I used a couple different papers- PTI and Cosmo Cricket I think. Buttons are from PTI.
Labels:
cherries,
crafty stuff,
fruit fushion,
kids,
me,
PTI,
thank you
Subscribe to:
Posts (Atom)